Have you ever had issues when trying to sort out dates in your spreadsheets? It often happens when dates are written in different formats, like text. The solution is to convert text to date.
Discover an easy way to fix this in Excel by using the Text to Columns Wizard tool!
Why are dates showing as text in Excel?
When we import data from other files, dates can sometimes be imported as text instead of dates. This is causing a date formatting problem in Excel.
>> Did you know cell values aligned left by default are text and those aligned right are dates and numbers?
How to change date format using Text to Columns?
In MS Excel, you can quickly change a date written as text to a date written in a date format.
Use the Text to Columns tool by following these quick 5 steps:
– Select all the dates.
– Go to Data and click on Text to Columns.

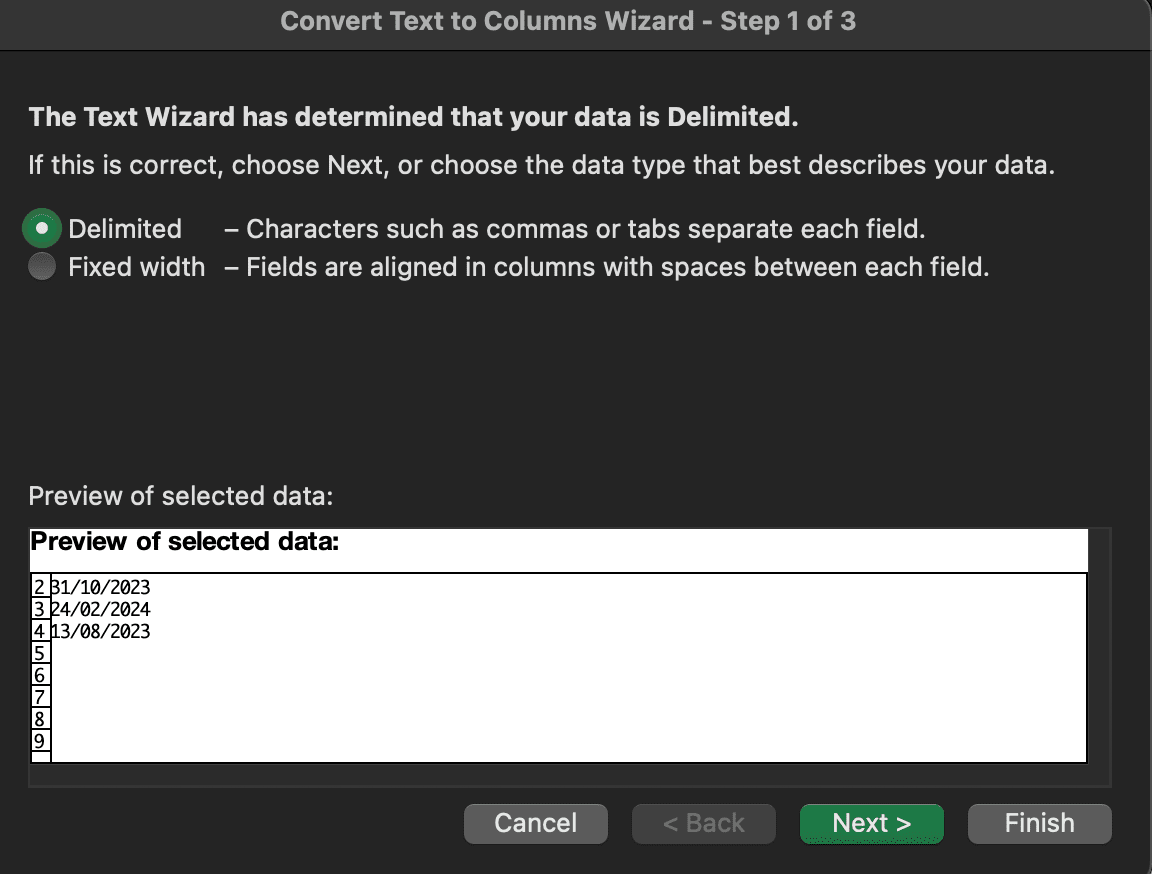
– Once it’s done, the Text to Columns Wizard pop-up window will open; by default “Delimited” is selected. Click Next.
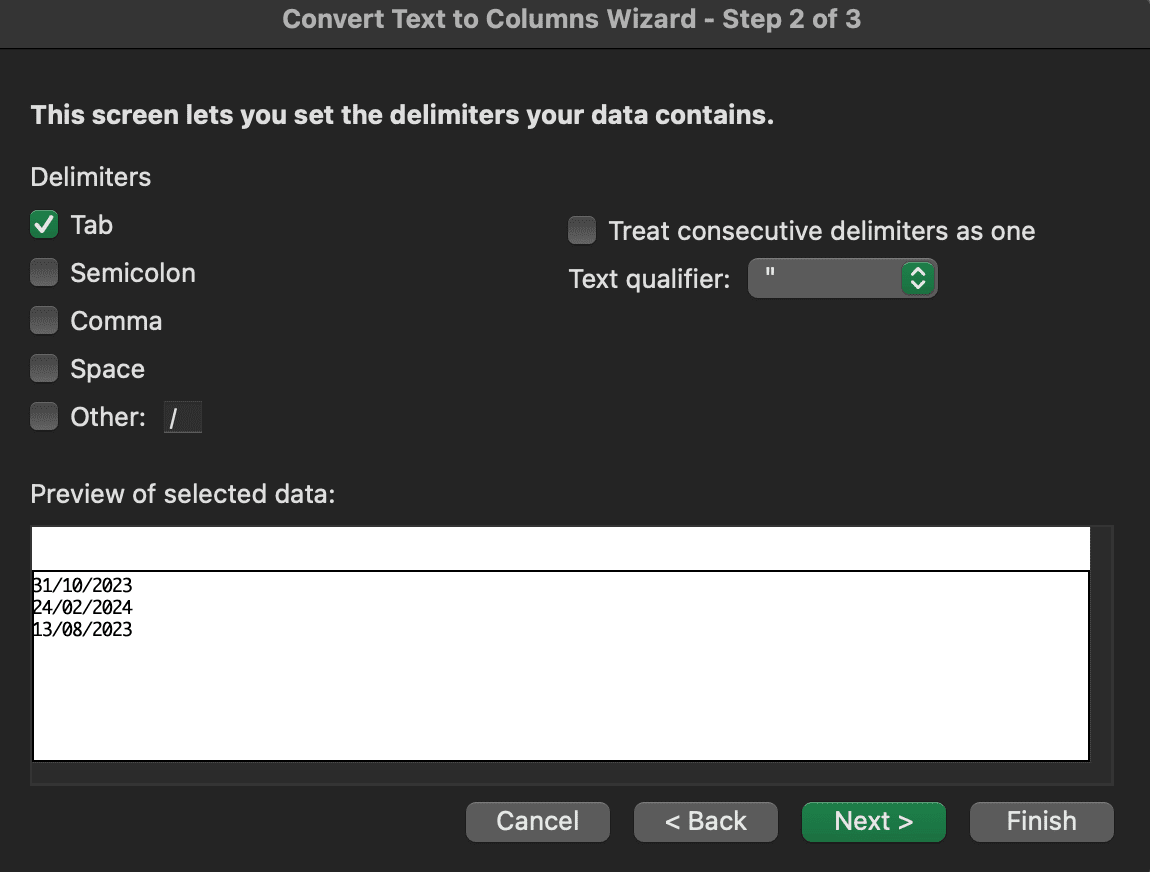
– By default, “Tab” is selected as delimiter. Click Next.
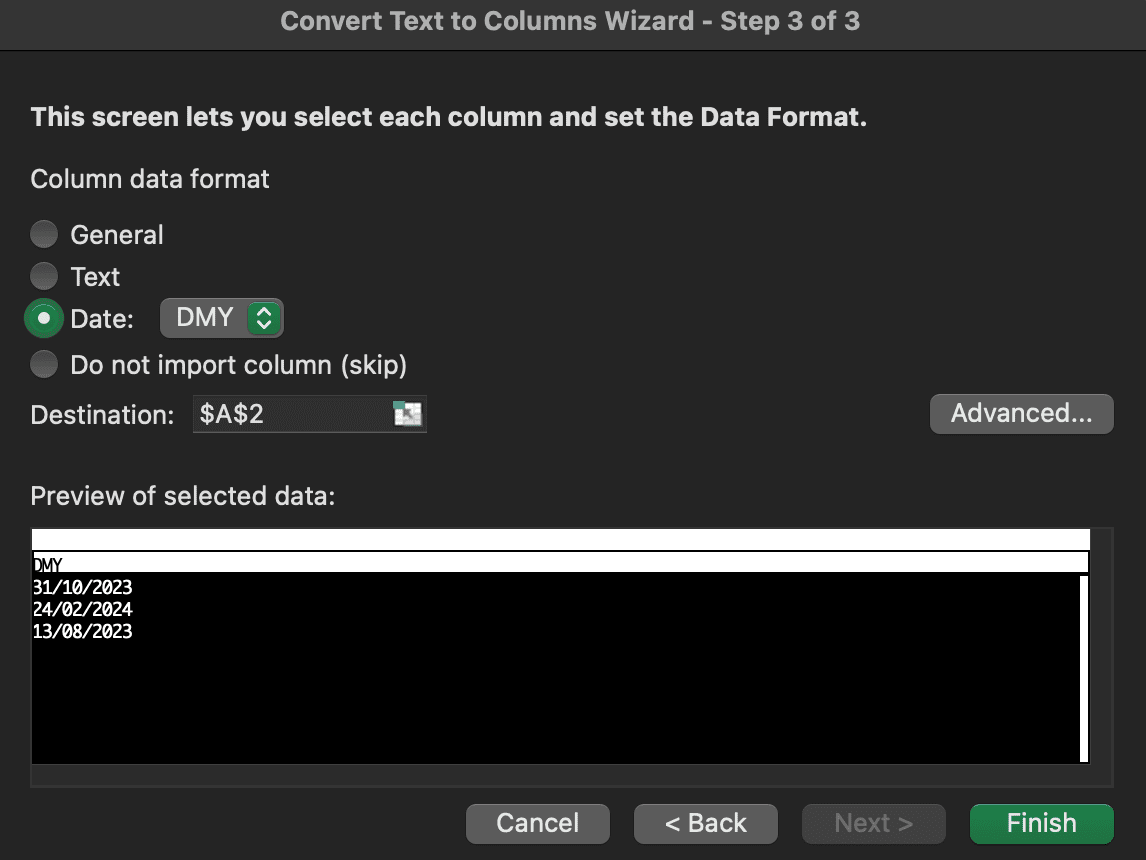
– For the last step, select “Date” instead of “General” and select the date format you want: DMY (Day, Month, Year), MDY or else. Click Finish.
Now all the dates are in the correct format!
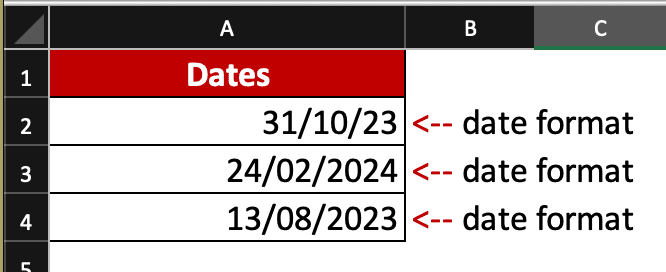
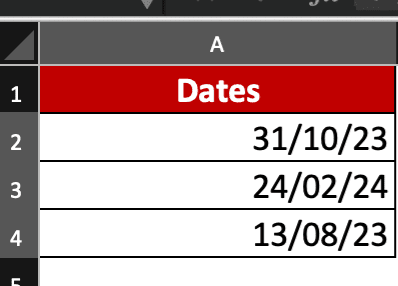
You notice that, in our example, dates are not following the same date format: the first row uses DD/MM/YY and the other ones follow DD/MM/YYYY.
How to change date formats in Excel?
Unifying date formats in Excel is extremely quick!
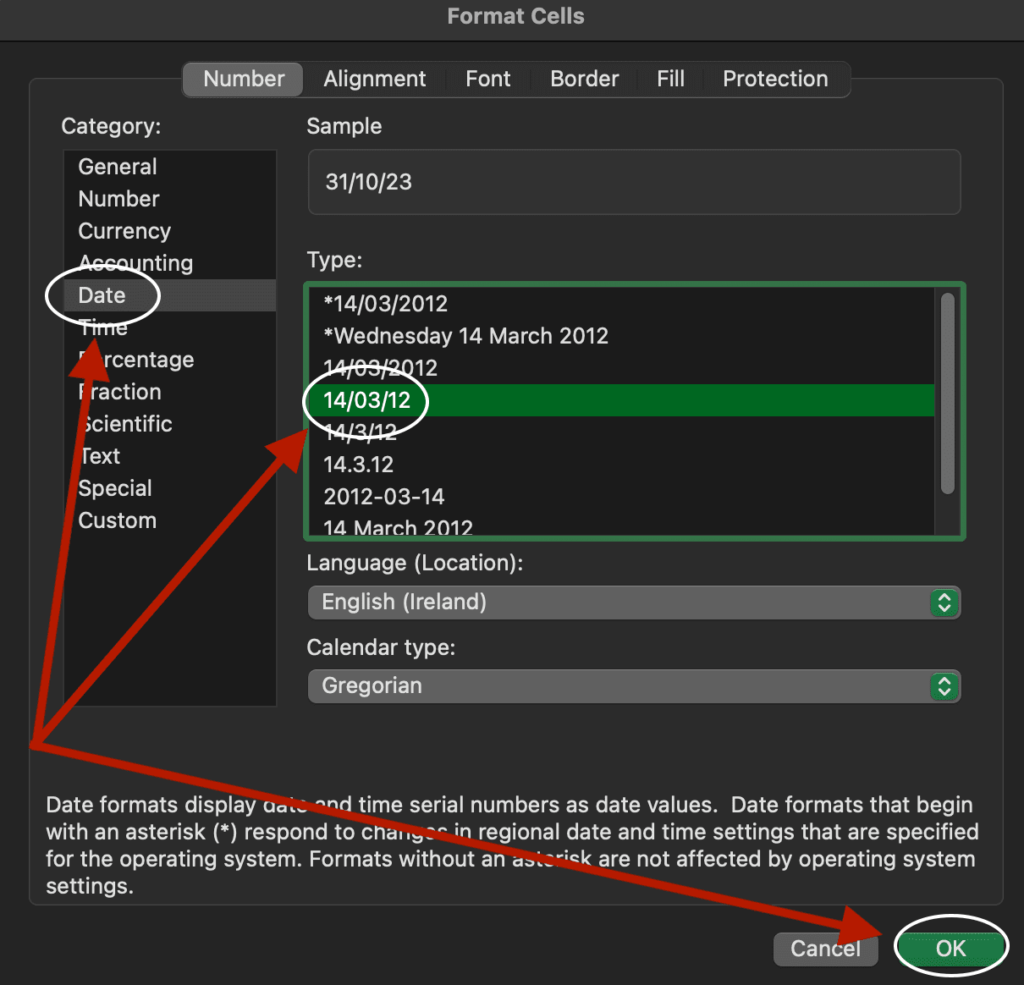
– Select all the dates and press Control+1 on your keyboard: the Format Cells window will pop up.
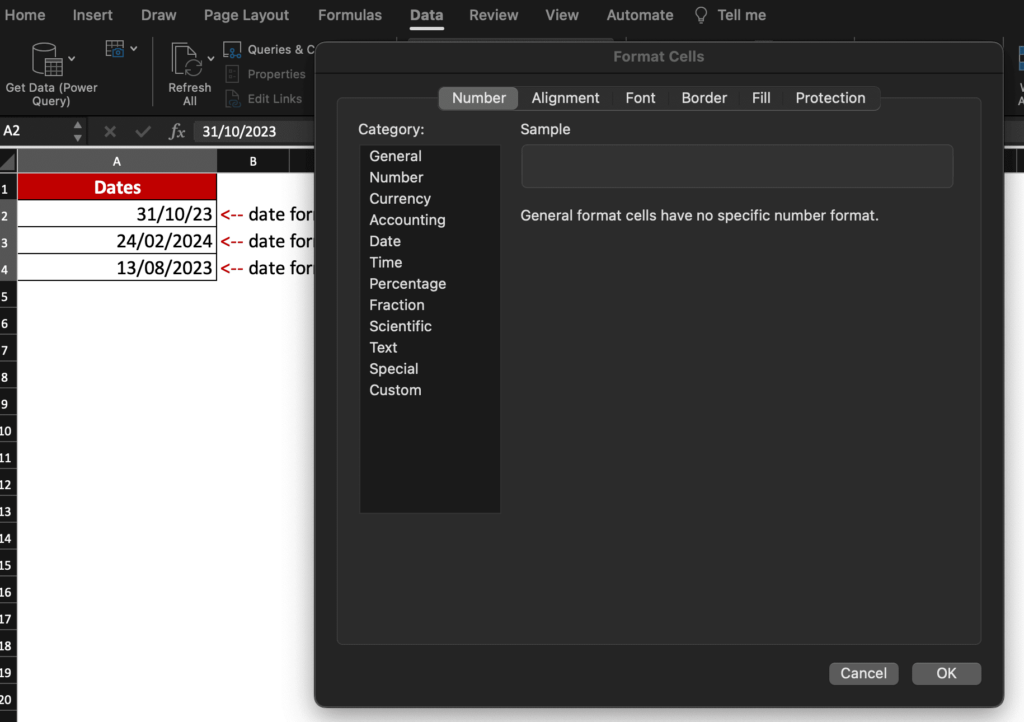
– Go to Date, select the format you want to use and click OK.
And voilà !
If someone asks you how to use Text to Columns to convert dates, now you know!
Discover more free tutorials thanks to Ted Jordan: how to get workbook stats, how to use COUNTIFS, how to unformat tables in Excel, etc.


