What is the Text to Columns tool in Excel?
In Microsoft Excel, the Convert Text to Columns Wizard takes text and splits it into columns. It is a handy tool to use with only 3 steps!
How to split text into columns?
The Text to Columns tool can be used to split dates into Day, Month and Year columns or to extract data from your email lists – and much more.
Follow these steps:
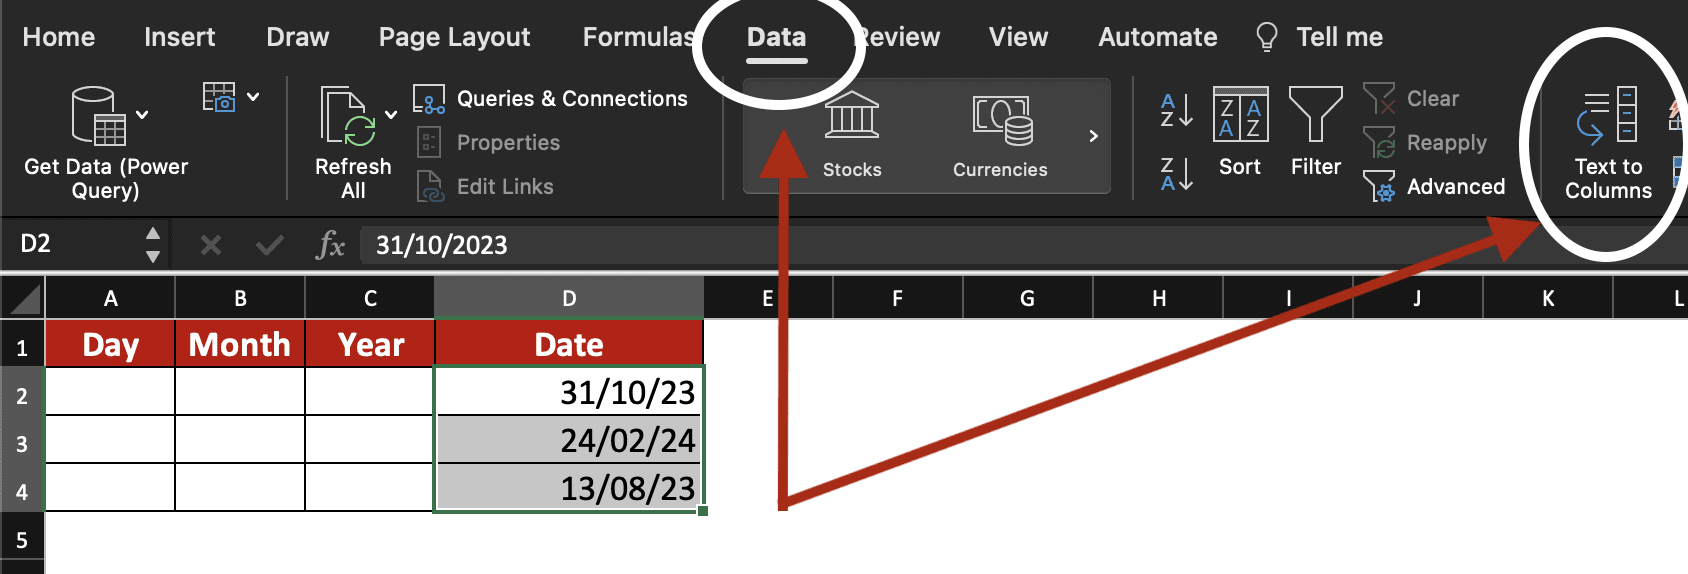
– Select the data you want to split into columns.
– Then go to Data and click on Text to Columns.
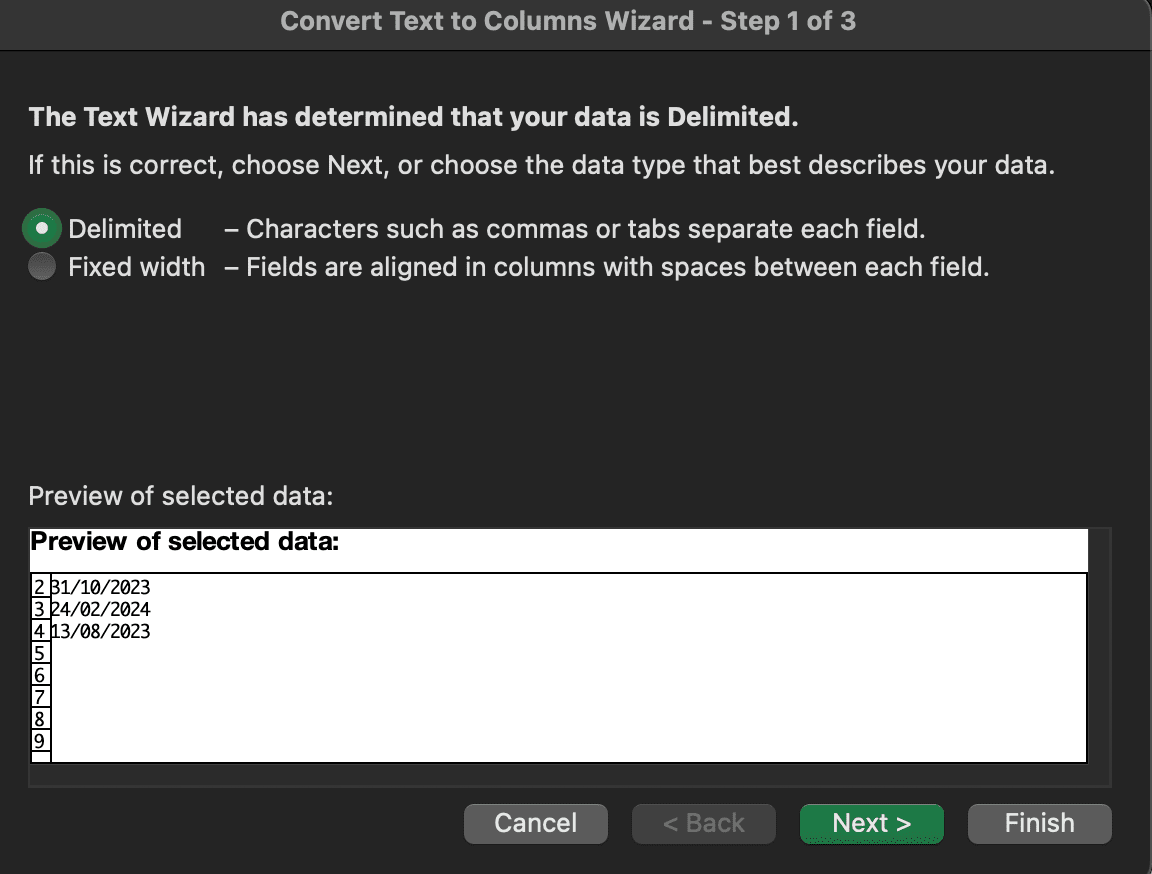
– In step 1 of the Convert Text to Columns Wizard tool, “Delimited” is selected by default; click Next.
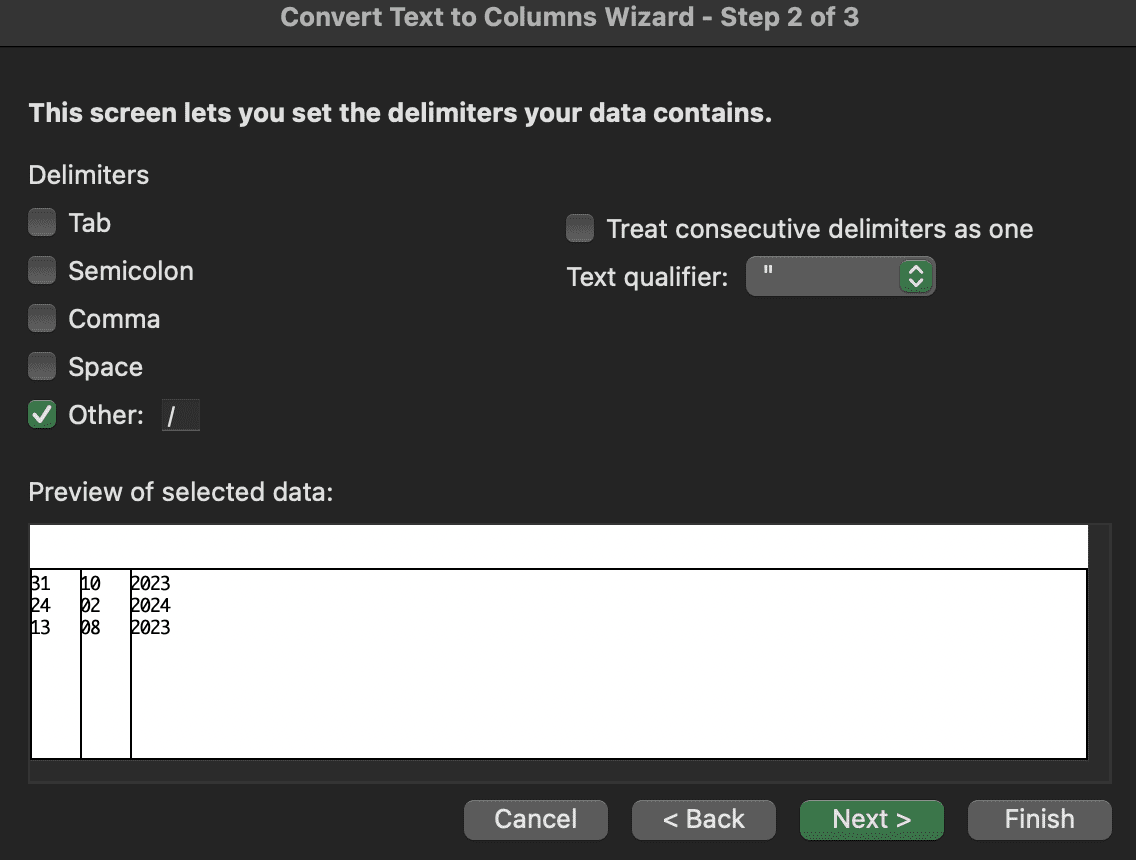
– In step 2, select the delimiters and click Next. A handy feature is that you can see a preview of your data at the bottom.
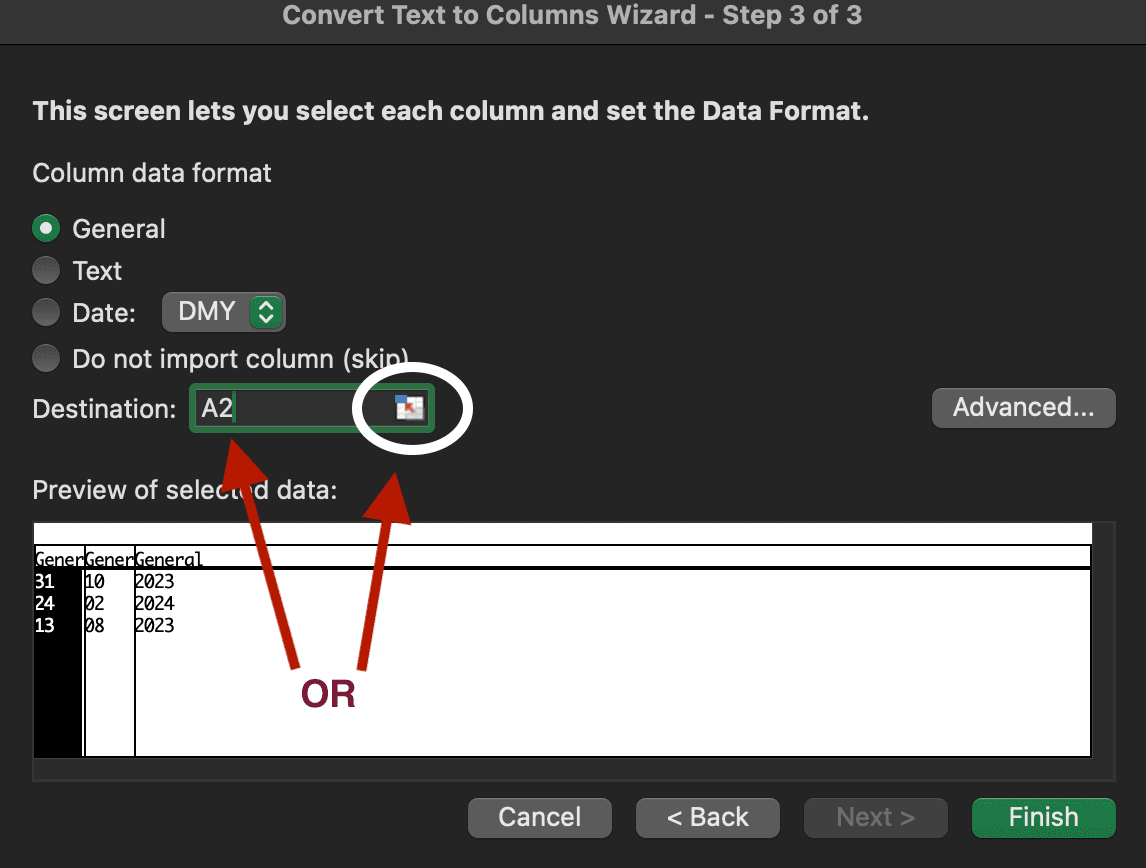
– Finally, in step 3, select the destination where you want the cells to be displayed. Note that you could only select the 1st cell if you want. Depending on the number of cells created from your text, be sure to have enough space on the right of the 1st cell.
Examples
Text to Columns – Date
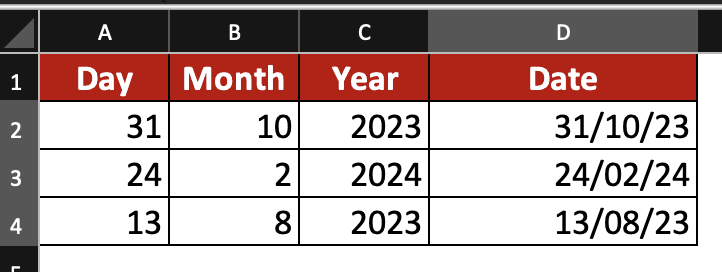
In this example, we want to split dates into 3 columns: Day, Month and Year.
The delimiter is / so we click on “Other” and add /. We can preview the selected data: 3 columns will be created as we wish.

We want the 1st cell to be in A2 so we enter A2 manually as destination or we could select it by clicking on the “select cell” window.
After clicking on Finish, this is the result. You might see a warning message if the cells you selected had already data in them.

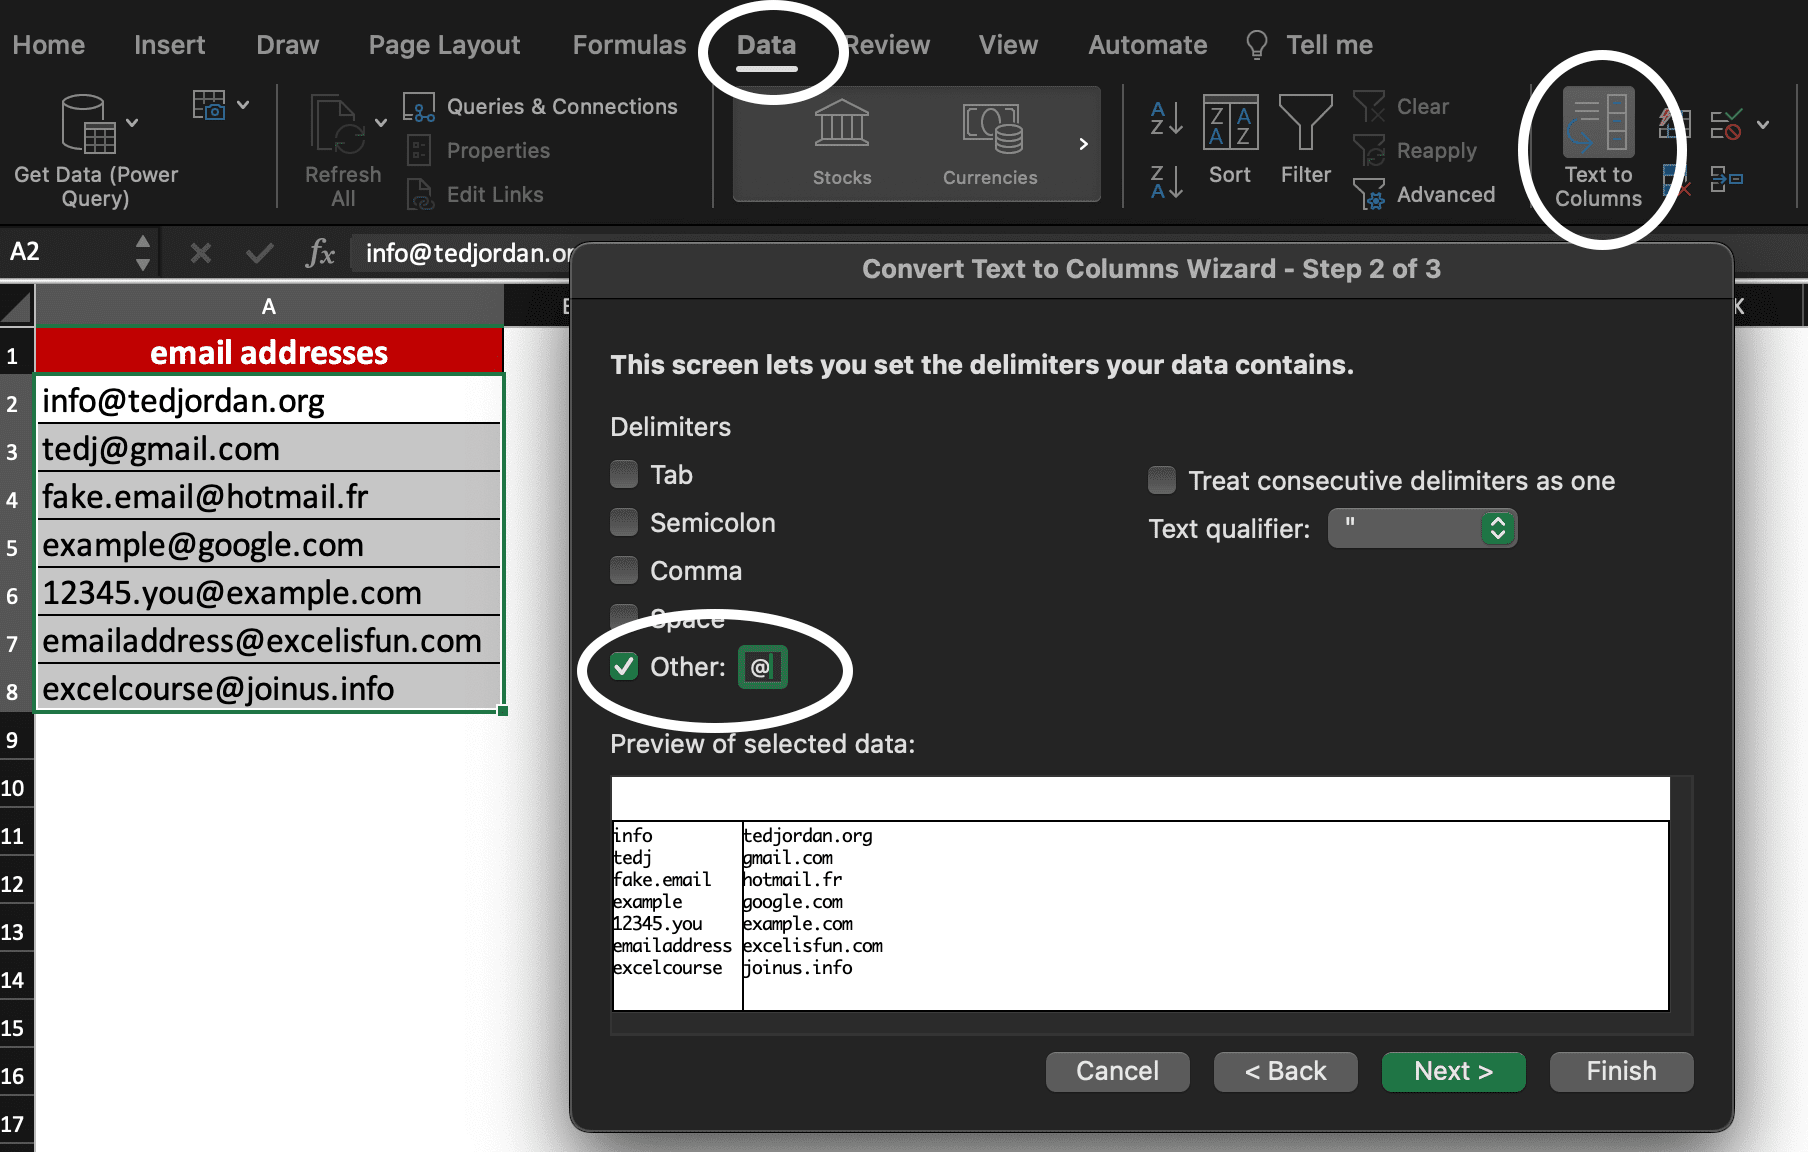
Text to Columns – Email address
Let say you gather a list of email addresses and want to extract all the data before the @ sign to create a customer list.
Once you have selected all your email addresses, clicked on Data, Text to Columns and Next on Step 1 of the Convert Text to Columns Wizard, you have to enter the delimiter @ next to “Other”.
After clicking next on Step 2, you will now select the cells where you want results to appear by manually entering them or by selecting them via the “select destination” window.
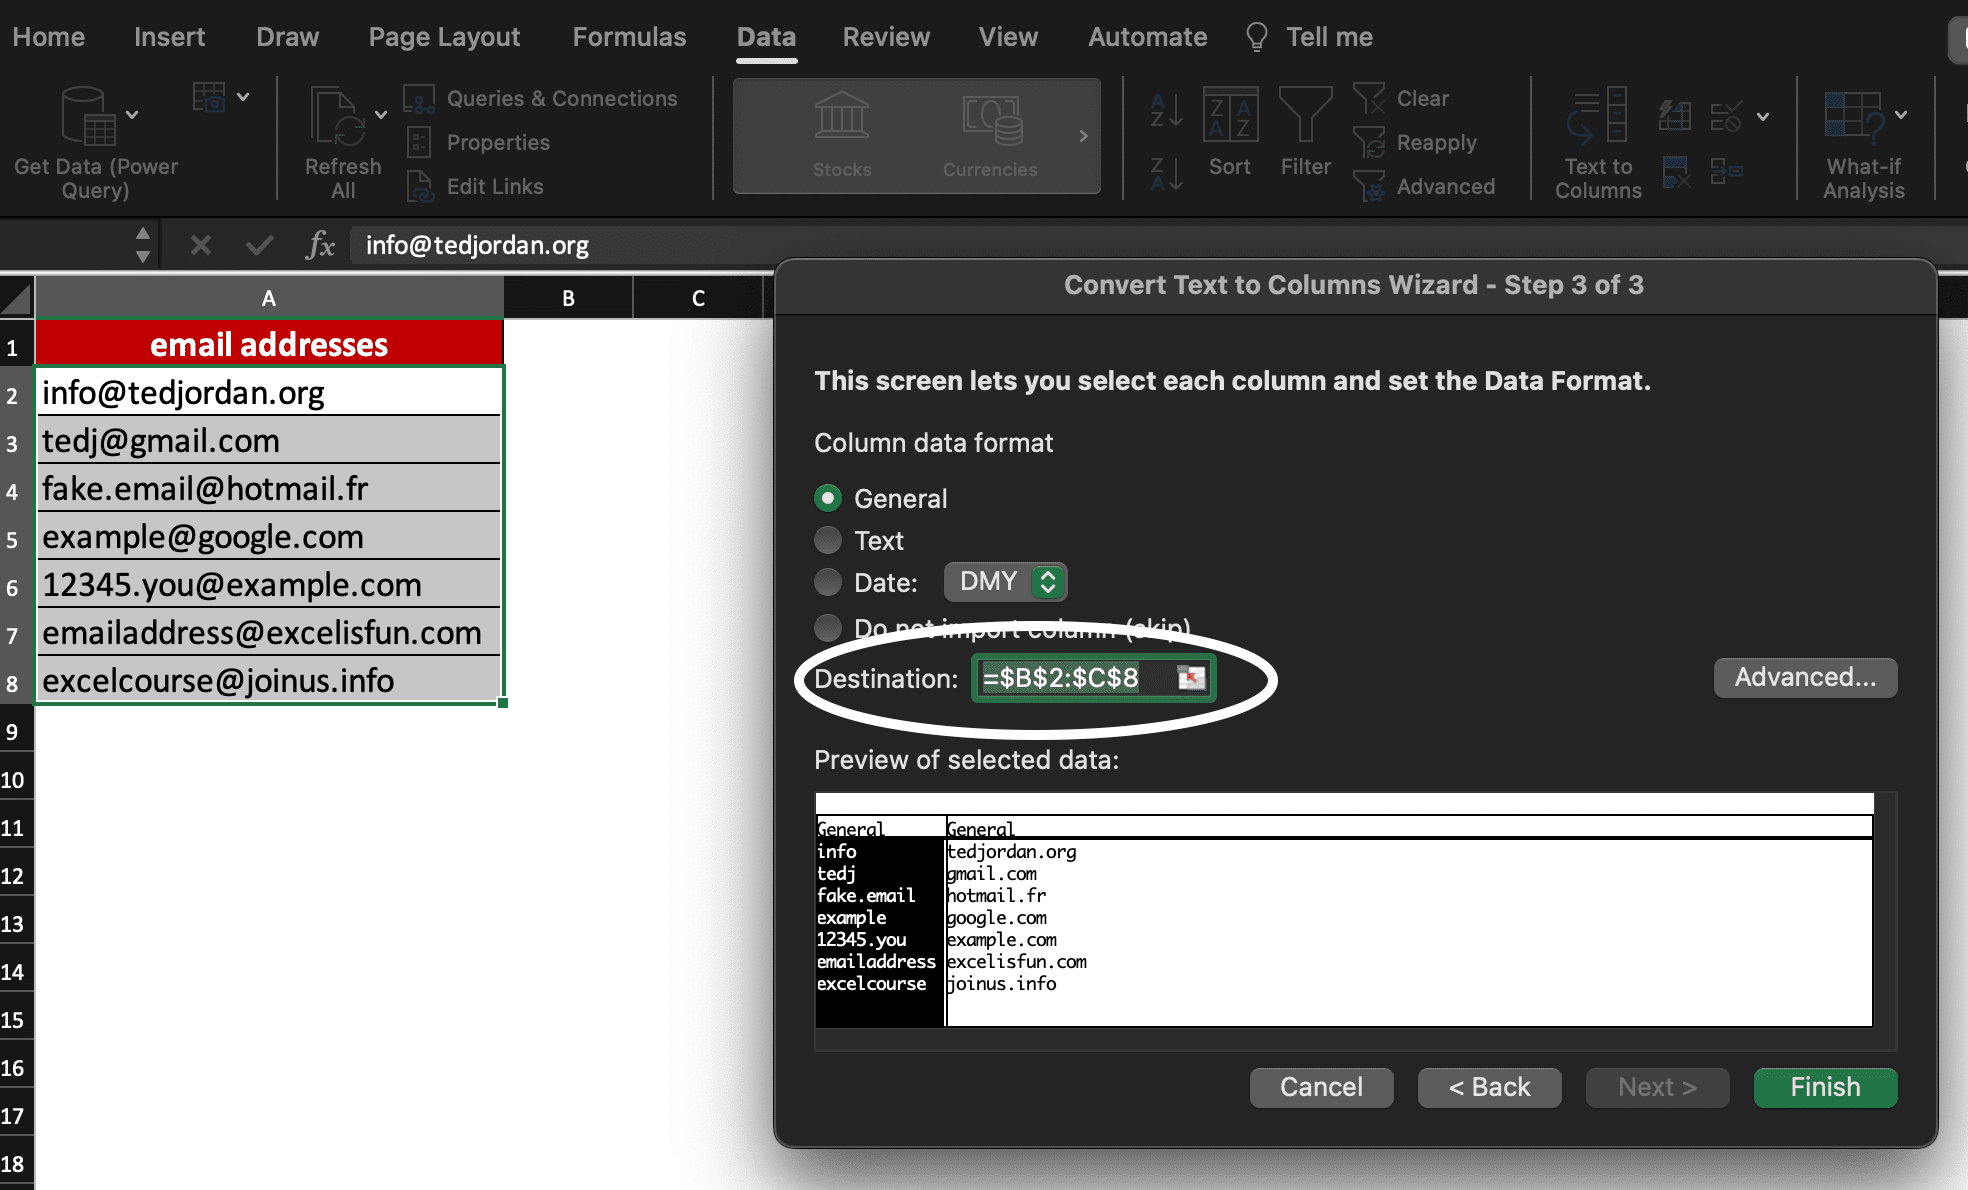
After clicking on Finish, you will see all the data before @ in column B and all the data after @ in column C.
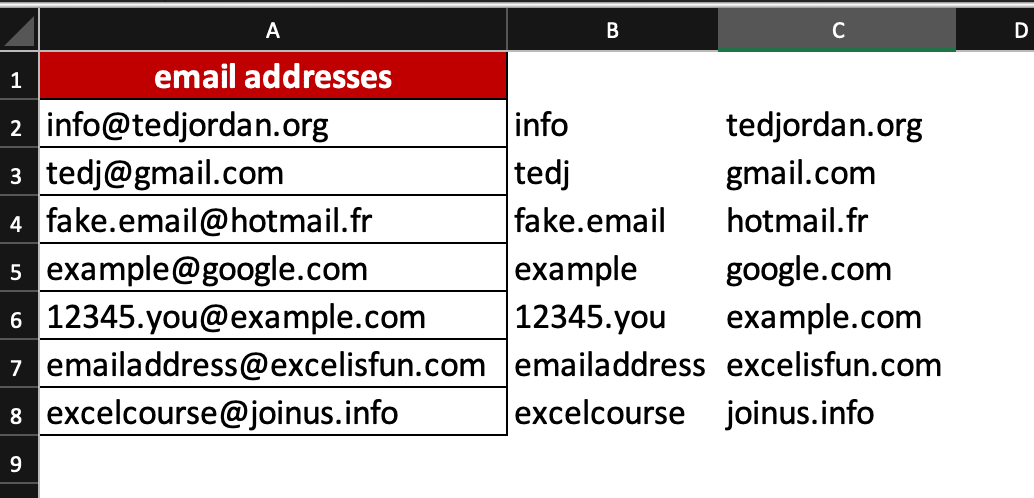
Now, you know how to convert text into columns in Excel!
If you wish to learn more about Excel Spreadsheets, join our certifying MS Excel Course!


